How to Find and Repair Leaks in Your Vacuum Veneer Bag
A vacuum veneer bag is a valuable tool for achieving high-quality, even pressure across veneers, but over time, it can develop leaks. Identifying
and fixing these leaks will help maintain an efficient and reliable vacuum system. Here’s a guide on where leaks most commonly appear, how to
locate them, and how to repair them.
Key Areas Where Leaks Can Develop
Vacuum veneer bags typically experience leaks in three main areas:
1. Bag Connector - This is where the vacuum hose connects to the bag.
2. C-Channel Closure - The closure mechanism that seals the bag shut.
3. Bag Surface - Pinholes or tears can develop in the main body of the bag.
Step-by-Step: Detecting Leaks
1. Testing the C-Channel Closure:

- The C-Channel closure, which holds the bag shut, can wear down over time and develop leaks, especially near the outer edges.
- To test for leaks, apply a thin line of water along the C-Channel closure while the vacuum is running.
- Watch carefully for any water movement; if there’s a leak, you’ll notice water running along the seam inside the bag.
- To temporarily fix a leaking C-Channel, clamp the outer ends with a spring clamp. This added pressure will usually be enough to stop the leak
until a more permanent solution can be applied.
Inspecting the Bag Connector:

- Begin by sealing the bag and applying vacuum pressure. Place a layer of newspaper inside the bag—this will help identify leaks by showing water stains.
- Flip the bag upside down to expose the connector area.
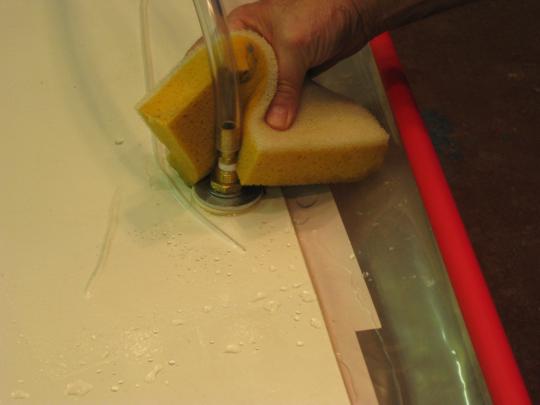
- Soak a sponge with water and apply it generously around the bag connector and hose connection. If a leak is present here, water will either travel up
the hose or stain the newspaper inside the bag.
Checking the Bag Surface for Pinholes or Tears:

- Surface leaks can be tricky to find as they are often tiny pinholes caused by sharp objects or overstretching.

- With the vacuum applied, sponge large amounts of water onto the surface of the bag, inspecting both top and bottom sides for any water stains on the newspaper lining inside the bag.
- Once identified, mark the area for repair.
Repairing the Leaks
1. C-Channel Closure Repairs:
- For a persistent C-Channel leak, apply a spring clamp for added pressure.
- Alternatively, you may need to replace the C-Channel if wear is extensive.
2. Fixing Leaks in the Bag Surface:
- To permanently repair leaks in the bag surface, a patch kit from Q.V.P. or a vinyl pool repair kit works well.
- First, clean the damaged area with a PVC pipe cleaner, which preps the surface for adhesion.
- Apply a thin layer of PVC or vinyl glue to both the bag surface and the patch.
- Allow the glue to become tacky for about 5 minutes before pressing the patch firmly onto the leak area.
- Place the patch on the outside of the bag for maximum effectiveness. Use clamps or a weight to keep pressure on the patch as it cures overnight.
3. Quick Temporary Fixes:
- For a fast, temporary fix, apply plastic tape to cover the leak, placing one piece of tape inside and one outside the bag for a double-layered barrier.
- While this isn’t a permanent solution, it’s effective for immediate use until you can apply a permanent patch.
By regularly inspecting these areas and using these methods to locate and repair leaks, you can extend the life of your vacuum veneer bag
and ensure it continues to perform at its best. Proper maintenance is key to avoiding costly replacements and keeping your veneer projects running smoothly.
Click here to watch a short video on finding and patching a hole in your vacuum bag


